Origami Christmas Gift Card Holder
Here are the products and measurements I used:
Supplies
Cardstock and DSP: Garden Green (102584), Basic White (159276),
Gingham Cottage (159651), Painted Christmas (156292)
Ink: Garden Green (159626)
Miscellaneous: Celebrate with Tags (159974), Real Red and Garden Green 3/8" Ribbon (159577), Mini Glue Dots (103683), Multipurpose Liquid Glue (110755),
Bone Folder (102300)
Measurements
Painted Christmas DSP: Cut a piece 9 7/8" x 8 5/8" and a piece of
Gingham DSP 2 1/4" x 3 1/8"
Basic White cardstock: scrap for gift tag
Garden Green cardstock: 2 1/8” x 3 1/4”
Instructions: Note: If you're using patterned paper and you want the finished pattern to run top to bottom, you'll need to rotate your paper 90 degrees so the pattern runs left to right.
I've created the sample using white printer paper so you can see the folds easily.
Step 1: Fold the DSP in half along the long side and open it back out. Make sure to run your bone folder along all the creases as you go.
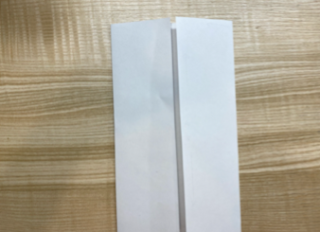
Step 2: Fold the left and right edges in to meet the centre fold.
Step 3: Open the paper out again and fold the 4 corners in to meet the nearest crease.
Step 4: Fold the left and right flaps in to meet in the centre.
Step 5: Flip the paper over and fold the bottom up so the diagonal edges meet at the fold.
You should be able to see a triangle in the middle of your fold.
Step 6: Fold the top down in the exact same way and tuck it inside the bottom edge.
You want them to overlap slightly as you do this.
This is a good time to run a bone folder or the back of a butter knife along your folds. Sharp creases will help all the sides sit flat.
Step 7: Fold in half and crease.
There should be plenty of space on either side to slide the gift card in and out.


.jpeg)

.jpeg)


.jpeg)


No comments:
Post a Comment